Back in the summer, I bought a bunch of old stills lenses and an adapter and started using them on projects with my LS300. There’s a number of reasons why, as a filmmaker, you might want to use vintage lenses on modern cameras (the imperfect look, manual control, price, novelty, hipsterism…) but for me it was because it helped fill in a gap in my knowledge.
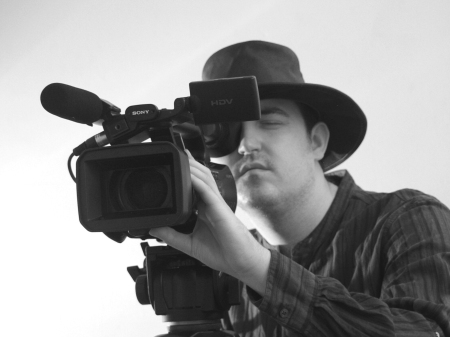
Me in about 2009 with my trusty Sony Z1. And hair.
I started learning the craft of filmmaking before the DSLR “revolution” so the cameras I learnt the ropes on were models like the Sony PD150, the Canon XM series, the Sony Z1 and several full-size Sony DVcam broadcast cameras. All of these cameras had something in common – a built-in zoom lens. And when you have a camera with an all-in-one zoom permanently fixed to the front of it, you don’t really get to learn much about what lenses do. You just frame the shot how you want and deal with the lens’ limitations regarding aperture and depth of field. And since I never really got on board with using DSLRs for video (aside from a brief affair with a Canon 550D), I didn’t have the practical education in lenses that many other filmmakers who started their journey with these cameras did.
Now that I have a cine-style camera with interchangeable lenses, this whole area of film and video production is now open to me and since I focus on narrative work, I started looking at getting a set of prime lenses so I could learn how lens choices affect the story being told.
But lenses are expensive. Even the indie filmmaker’s budget lenses of choice, the Samyang/Rokinon Cine DS line (a series of manual photography lenses with small modifications to make them more video-friendly), cost between £200 and £500 each – which very quickly adds up. And since I was used to zooms, I had no idea what focal lengths would be a good fit for me so it was hard to know what lenses to put my money into. What I needed was an inexpensive way of getting into prime lenses so I could learn what the focal lengths looked like and hopefully be able to use them on shoots to deliver acceptable results.
Then I saw this video by Caleb Pike over at DSLRvideoshooter.com discussing a set of vintage lenses that could be had for very little money. Now, I knew you could adapt old lenses to modern mirrorless cameras, but since most of the discussion was from photographers looking for some secret ingredient to add something different to their pictures, I had kind of written vintage lenses off as a hipster photographer thing. But as Caleb pointed out, some of these vintage lenses have very consistent looks, are fully manual and are very well suited to being used like budget cinema lenses. And that piqued my interest.
The brand he recommended in the video were Chinon – a Japanese company that were pretty well-known in the UK since Chinon cameras were sold in Dixons during the 70s and 80s. The Chinon lenses were well-built (mainly metal with some heavy duty plastic), optically pretty consistent with regard to colour and contrast, sharp enough for 4K video and completely mechanical with no servos. And this last point was a big thing for me. Modern photographic lenses tend to be autofocus lenses which means they have servo motors in them. This makes it very tricky to get accurate focus pulls because how far the focus racks is dependent on how fast you rotate the ring. But you don’t get any of that with older glass – you turn the ring 45 degrees, you’ll get the same focus throw every time. They’re M42 or screw mount lenses – which means you can adapt them to pretty much any modern mount because the flange distance on M42 is massive.
Plus they’re cheap. Like, real cheap.
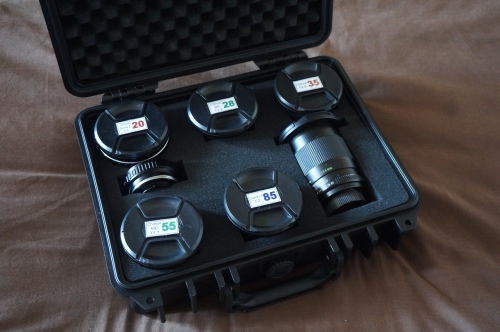
A quick search on ebay bought up loads of Chinon lenses, all going for between £25 and £40. With careful bidding, I could put together a set of four or five lenses and an adapter for less than £150!
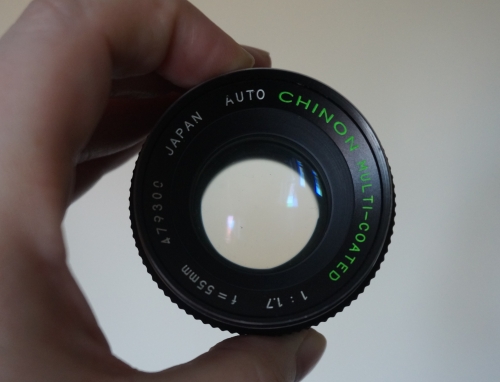
The Chinon MC 55mm in action. I think this was from about 15′ away at f2 with a lot of ND.
The first lens I got has actually proved to be my favourite. The Chinon Multi-Coated 55mm f1.7 was a standard kit lens with many Chinon SLRs, so it turns up a lot on ebay and I got mine for £25 which is a steal. It’s a bit soft all round when wide open, but at f2 the centre sharpens up and by f2.8 it’s decently sharp across the frame. (I should point out that I’m using this on a Super35 sensor – on a full frame camera the edges are quite soft until about f4, but if you’re using it on a cropped sensor, you won’t see this and the overall performance will be perceptually better). A 55mm lens has a normal field of view on full frame, but on a Super35 camera like the LS300 it functions like a short telephoto, perfect for close-ups, and at f2 you can get some really nice shallow depth of field with it. I used it on a corporate gig a couple of weeks after I got it and it looked great!
I was hooked and started looking for other Chinon lenses to round out my set. I got the 35mm and 135mm from ebay and I managed to get a 28mm Cosinon (a Chinon by another name) from an online 2nd hand camera store.
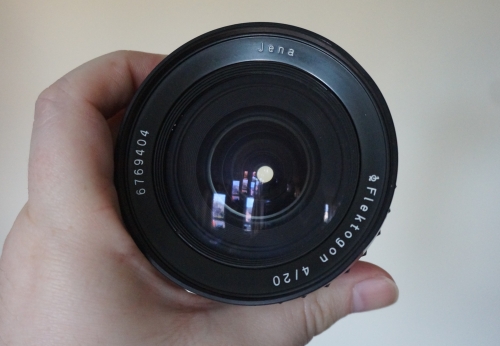
Note the minimal edge distortion on the 20mm Jena, even with a Super35 sensor.
The thing is, there were focal lengths I needed but didn’t have. I needed a decent wide angle for establishing shots, but there aren’t many super wide lenses from this era and Chinon, like many manufacturers, didn’t seem to make one. Eventually I found a 1960s Zeiss Jena Flektogon 20mm f4, which, while a bit slower, was decently sharp wide open and had little to no distortion. Even though lens purists don’t consider the East German branch of Zeiss’ lenses to be true Zeiss products, the optical design and functionality are great. My version didn’t have the Zeiss badge on it (since it was meant for export) and just said “Jena”, which made it a bit cheaper than it might otherwise have been, but it was still £100.
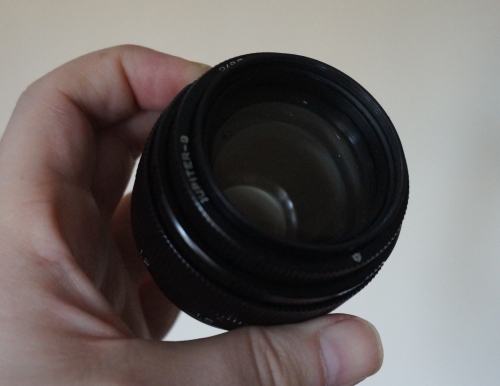
At f2, the Jupiter 9 has some really smooth bokeh and is sharper than Lee Mack covered in lemon juice.
The other lens I was missing was an 85mm or something similar. On a cropped sensor this is about the equivalent of 135mm which is a great Big Close Up lens. Unfortunately, just like the 20mm and unlike today, 85mm was not a common focal length for 1970s SLRs. There are a few out there, however, and the one I managed to get is a fairly common Russian model called the Jupiter 9 (why is it so many lenses from this period sound like space rockets?). The Jupiter 9 85mm f2 is a copy of a 1950s Zeiss Sonnar and depending on what version you have, the imitation could be pretty close or not quite there. My version appears to be from the 90s towards the end of the Jupiter’s run, although I’m not sure if that’s good or bad! All I do know is that this lens produces some lovely images, with decent sharpness and very smooth bokeh when opened up to f2. One thing that might be a selling point for some filmmakers is the “preset aperture” system. This is where you have two aperture controls – one sets the maximum aperture (up to f2) and the other is a de-clicked iris ring that smoothly opens the aperture anywhere up to that exposure. Photographers seem to think this is a feature necessary for filmmakers because it means you can smoothly change the aperture during a shot – although I’ve never had to do that in all my years of film work so maybe it’s a documentary shooter’s thing…
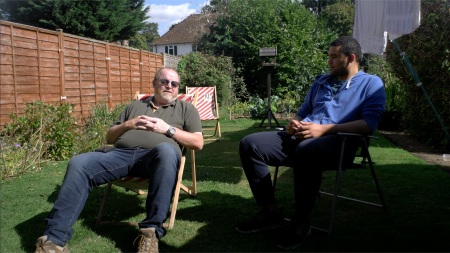
I’ve managed to use these lenses here and there on a few shoots, but the other weekend we got a chance to try them out on Eric’s Black Magic Pocket Cinema Camera 4K (aka the longest camera name in the world) and see what they could do on a narrative project. This was a last-minute thing so we hurriedly scrambled together a location (a village hall we’d shot in before), an actor Spencer (who we’d worked with before) and a script (hastily bashed out by me the night before).
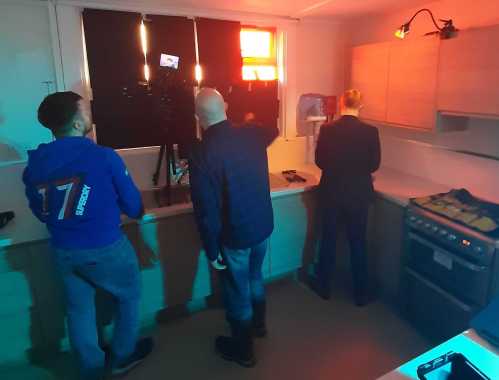
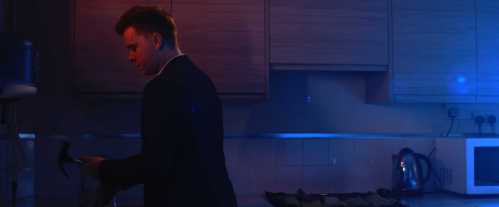
The structure of the film was simple. Spencer played a “psychopath for hire” and the scene was him clearing up after a gruesome job. The only dialogue was his inner monologue, recorded as a voice over. This allowed us to focus on the visuals – the production design, the framing, the lighting and of course the lenses. We decided to set the sequence at night – a somewhat challenging decision since we were shooting during the day – and the first scene was lit by a blue wash with an orange key, courtesy of a COB light and grid, coming through the kitchen window to represent a sodium vapour streetlight outside. A Scorpion light was clamped to one of the kitchen cupboards and used as a bit of back light.
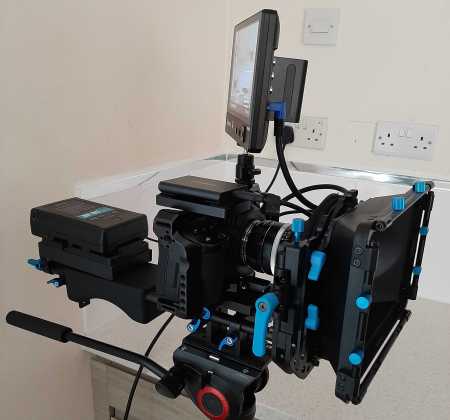
Somewhere in the middle of this Franken-rig is a Black Magic Pocket Cinema Camera…
Because we were filming on the Black Magic Pocket Cinema Camera 4K, which has a micro four thirds sensor inside it, we had to deal with a 2x (note for post-millenials – this is pronounced “two times” not “two ecks”) crop factor. This meant that our first shot, using the 20mm Zeiss Jena, wound up behaving like a 40mm. This is one of the downsides of using vintage glass with micro four thirds cameras – you don’t tend to get very many wide lenses. The 20mm Zeiss was the widest prime I had and we really had to back it up to get what we needed in shot.
One of the other features of old lenses is that they are prone to lens flares. Sometimes they look great but more often than not you’ll want to use a matte box or a lens hood to keep things under control. The above shot was from our wide 20mm Zeiss Jena at f4 and the light that was flaring was just off camera and could be easily flagged but we decided to leave it in because it left us “nursing an Abrams.” Plus we wanted to see what they looked like when graded.
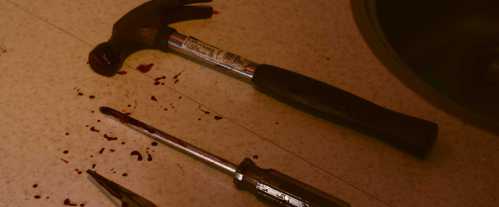
The upside of the aforementioned crop factor, however, is that you get to use the fast “normal” lens, in this case the 55mm Chinon, as a strong portrait lens with an effective 110mm focal length. While the lens is a bit soft at f1.7, when we used it at f2.8 it was tack sharp and we wound up using it for a lot of the shots in the film including this insert of Spencer’s bloodied tools.

Feet plus duck tape plus fake blood (golden syrup, water and red food colouring) equals mess
The above shot, also using the 55mm Chinon, was the end frame of a complicated shot involving a slider, a low angle tilt and pan and a focus pull from Spencer in the background to the carnage in the foreground. Eric and Rick managed to get this shot within a few takes, which is something that couldn’t be guaranteed with a modern servo lens. It’s also worth noting that it might have been easier for Eric if he’d had a follow focus and whip or a wireless rig to pull focus with (more to add to my “kit I might need” list) – something that, again, wouldn’t work that well with an auto focus lens.
All in all, we managed to use everything except the 85mm Jupiter 9 and the 135mm Chinon on the shoot, primarily because we had no need for what were essentially long telephoto shots on the BMPCC4K (170mm and 270mm respectively). We also used Rick’s Voigtlander Nokton 25mm for one shot – a modern rebuild of one of their vintage designs, loved for its frankly amazing f0.95 aperture – and it cut together seamlessly with the older lenses.
All in all, the shoot went well and I’ll be interested to see how Rick cuts it all together. While this impromptu project was limited in its scope, it did manage to show me that really good results can be gotten from decades-old inexpensive glass and that if you choose your lenses correctly, you can create an optically consistent and mechanically functional lens set for less than the price of one modern lens.
(Thanks to Tom for the BTS stills and Rick for the screen grabs)

